In the spring of 2019, I made the decision to downsize my life, sell my mobile home, liquidate my debt and finally build the tiny house I had planned for and collected materials for the build over three years.
I had assisted in a few Habitat for Humanity builds, built several barns, stables, a couple of milking houses, and extensively renovated the five homes I had lived in. I had the skills.
I signed up for three Tiny Home building workshops prior to my build. The first was run by Andrew Morrison at TinyHouseBuild.com
and the second with Ethan Waldman of TinyHouse.net and the third with Christian Parsons and Alexis Stephens of Tiny House Expeditions Then I ordered copies of the 24th edition of the Canadian Electrical Code and the 2015 edition of The National Plumbing Code of Canada and downloaded a copy of the International Building Code Appendix Q.
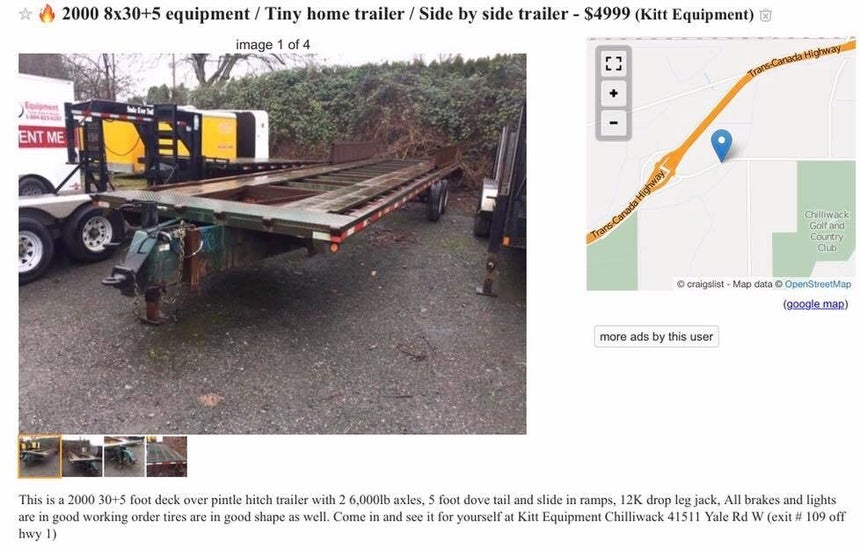
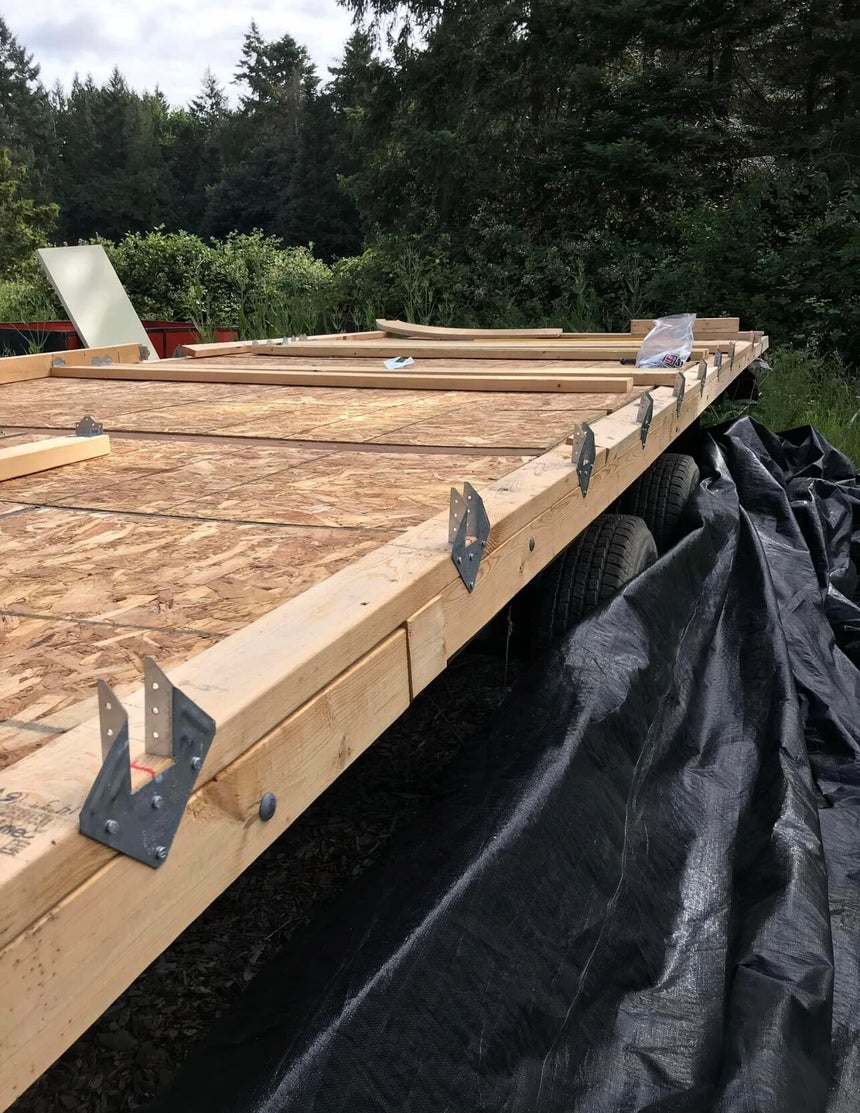
I bought a used Heavy machinery hauling flat deck trailer. I didn't pay the asking price.
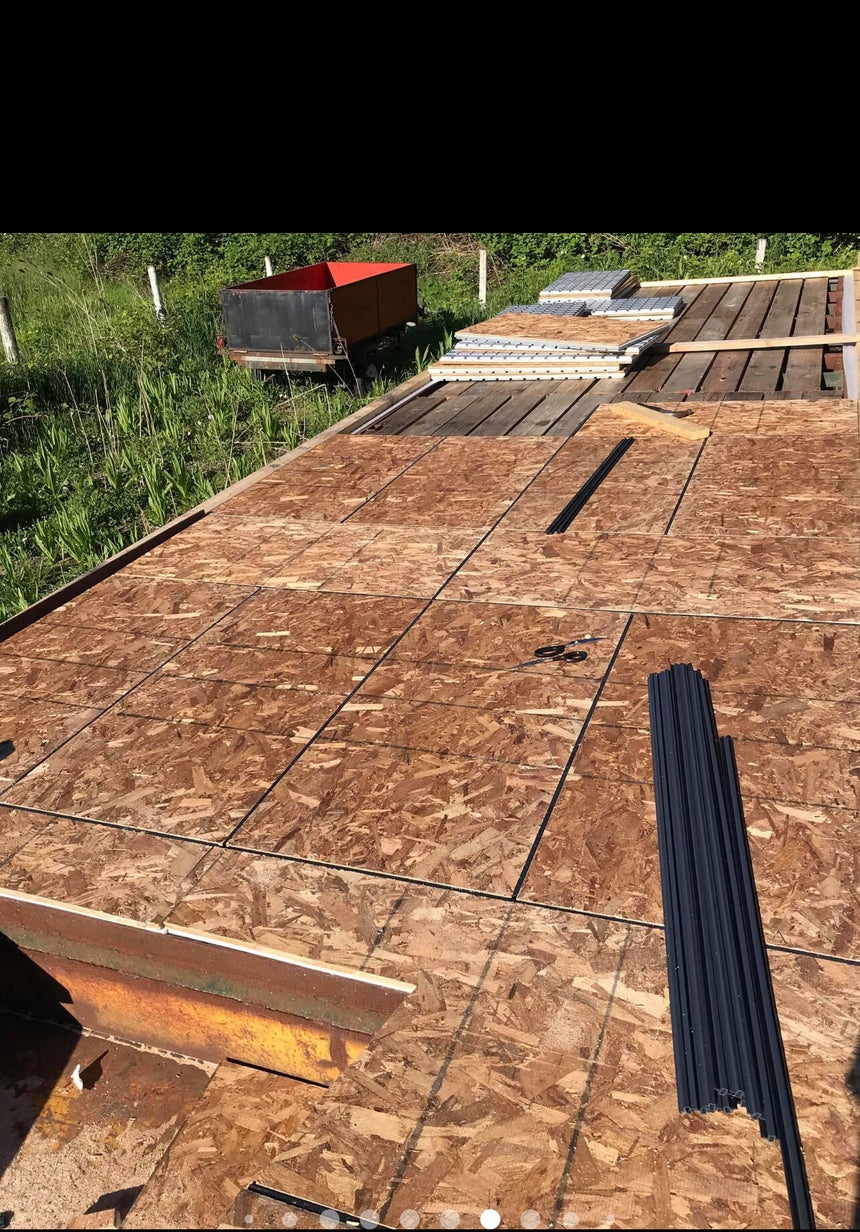
I removed the decking on the trailer, as much of it was damaged and replaced it with the 200+ year old Douglas Fir floor beams I had salvaged while helping demolish an old building in Victoria BC.
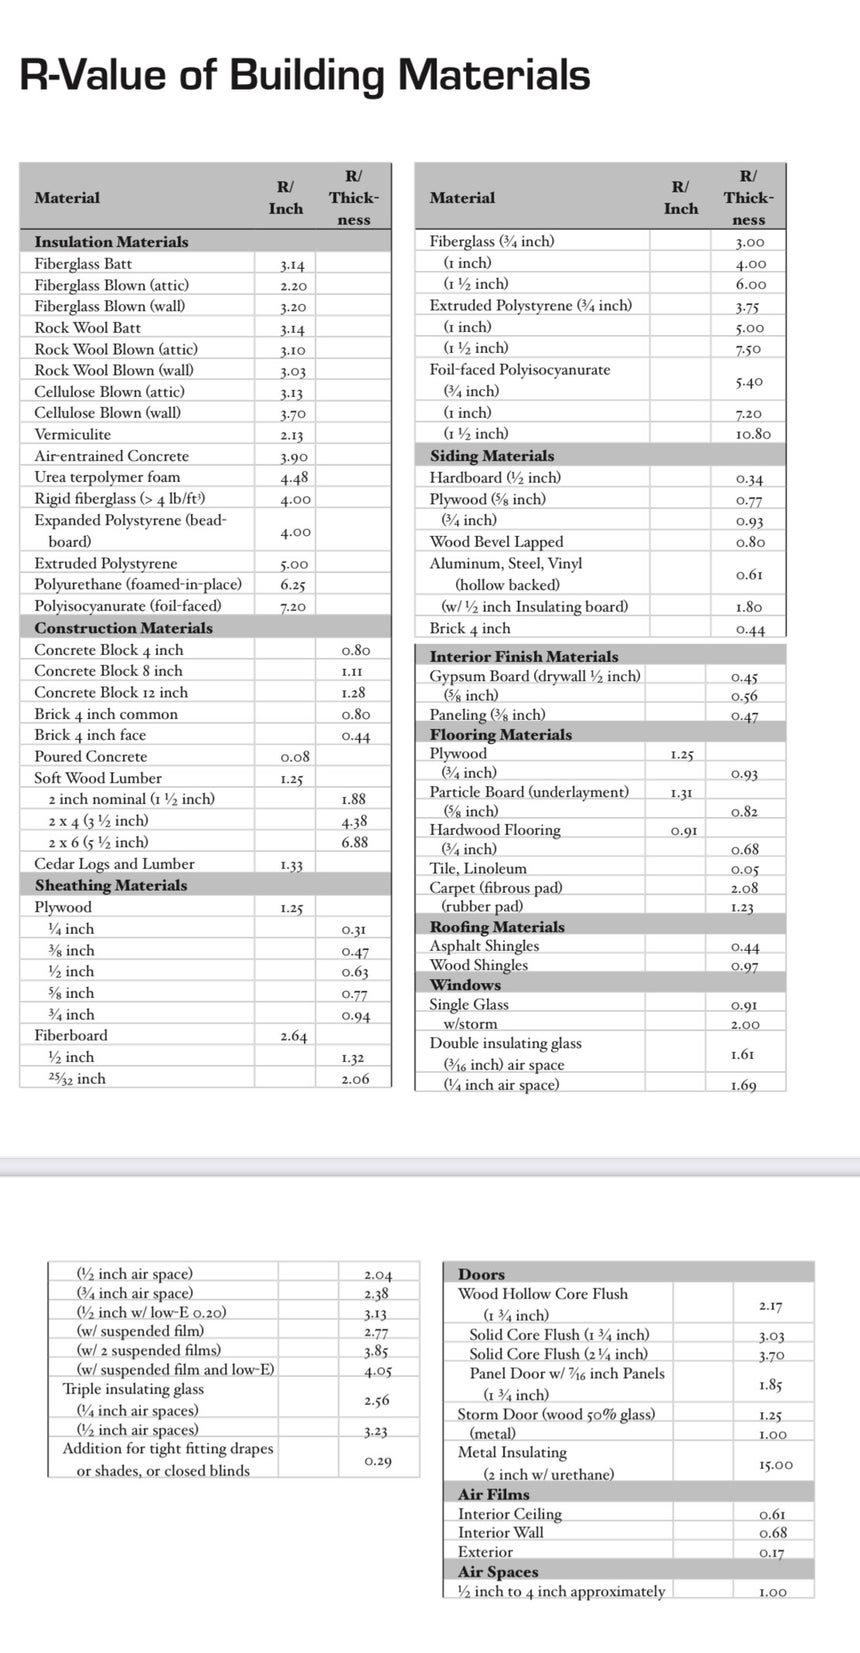
Over the Douglas Fir decking, I installed an insulated subfloor. I used Amdry OSB panels; R-7 expanded polystyrene (EPS) foam layer laminated to an oriented strand board (OSB) top layer. The rigid EPS molded foam contains water drainage/air channels that allow convention airflow under the subfloor to dry up any moisture that might migrate between the subfloor and the decking boards. The 2" R-7 panels were priced at about $25 each. The barbed spacers that connect the panels are sold separately and cost $20 for a bag of 15 4-ft. pieces. I got a considerable discount during a sale at RONA, but the subfloor was one of my expensive purchases.
I bolted 2x4 boards to the metal frame edge of the trailer deck, level with the top surface of the Amdry subfloor and placed the first of the wall horizontal stringers along the edge of structure, bolting the stringer boards through the Amdry to the metal frame of the trailer deck.
The framing of the walls followed the official building code for framing a residential structure. https://codes.iccsafe.org/s/IRC2015NY/part-iii-building-planning-and-construction/IRC2015-Pt03-Ch06-SecR602.3.1
I used almost entirely old growth dimensional 2x4s in my build. These were salvaged from a collection of framed 4’x8’ wall panels, originally built to use in creating an annual Hallowe’en Haunted House Maze. I bought 80 panels for $200! Once broken down I had 160 2”x4”x4 foot pieces, and 240 2”x4”x92” pieces and 80 sheets of top quality plywood good-both-sides! Yes, they were all painted on one side, with some pretty interesting and gory scenes, but I put the painted sides in. I hauled them all to my build site, on the roof of my Pontiac Vibe, 10 at a time. It was hard HARD work! That was probably my biggest and best bargain buy!
My friend Karen and her daughter Sierra helped me pull nails and unscrew screws, and that help was immensely appreciated. Sierra also helped me put in the two windows to get my build towable. Then she hurt herself at her job, and could only sit by to call the ambulance if I fell off the roof while putting on the temporary roof. That help was still very valuable.
Two things happened as the wall framing was going up.
The first thing that happened was I was told I would either have to stop my build, or the municipality would impound and dismantle it.
The second thing that happened was that I was invited to move my build to an acquaintance's farm in a municipality that had no established bylaws against Tiny Home builds and would permit me to continue to build my “Art Studio”. I was given permission by my current municipality (where I had lived and paid taxes for 20 years!) to build the structure to a point where it would be safe to tow.

This was both good and bad.
I didn’t have time to do all the measuring to build in all the window and door openings, and so only installed two of the originally planned eight windows, and one of the doors. I also didn’t finish the arched glu-laminated roof beams, but opted for a flat temporary roof for transport.
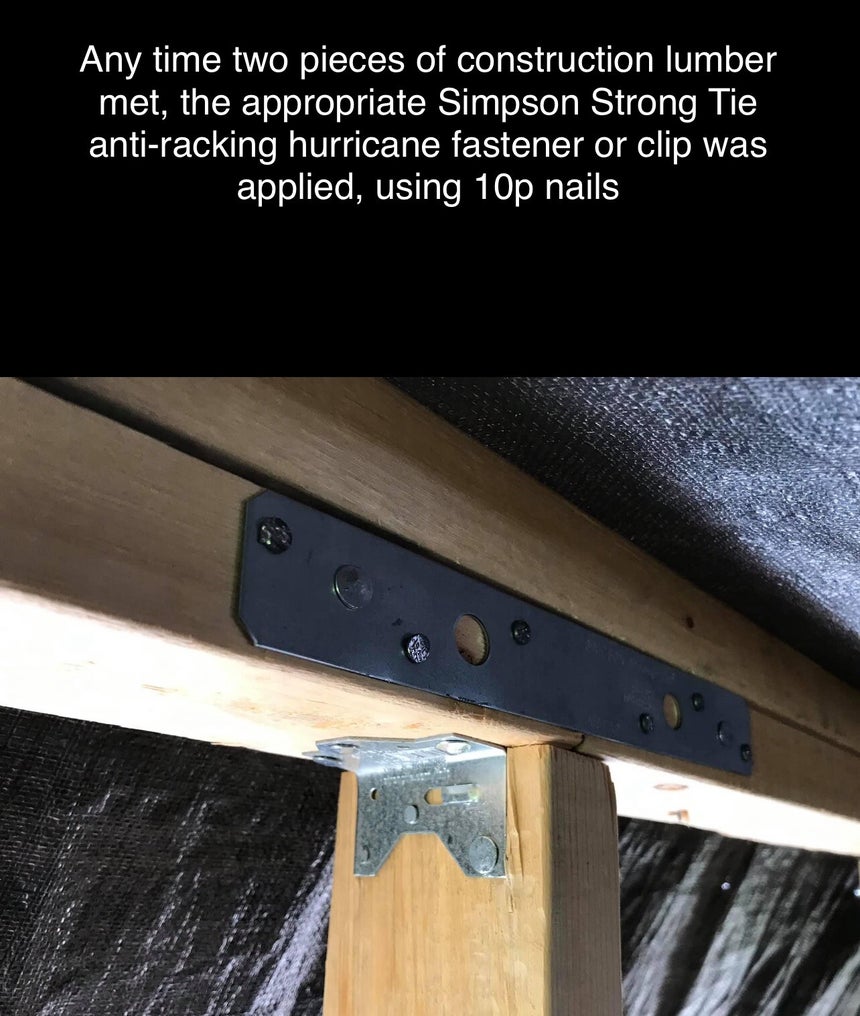
Every place a 2x4 met up with another, the appropriate Strong Tie anti-racking hurricane clip, strap or support was also installed. I ran tension wires from upper corners on all four corners of the unit to centre front and back and down the sides.
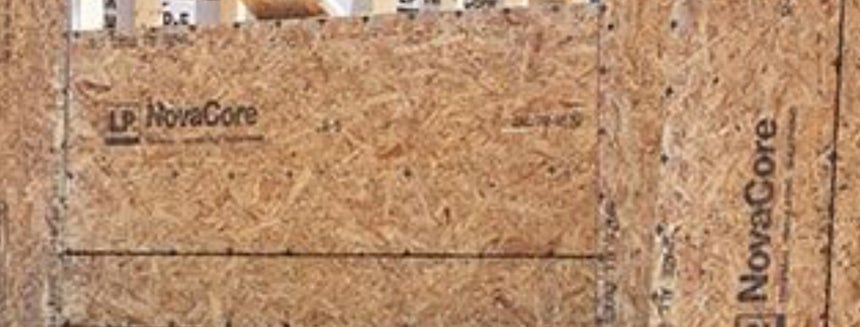
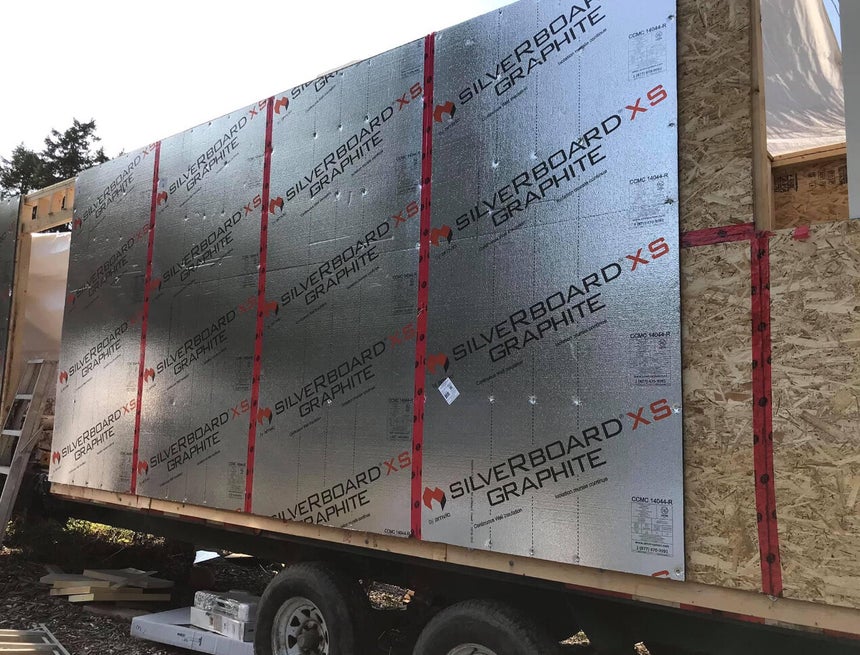
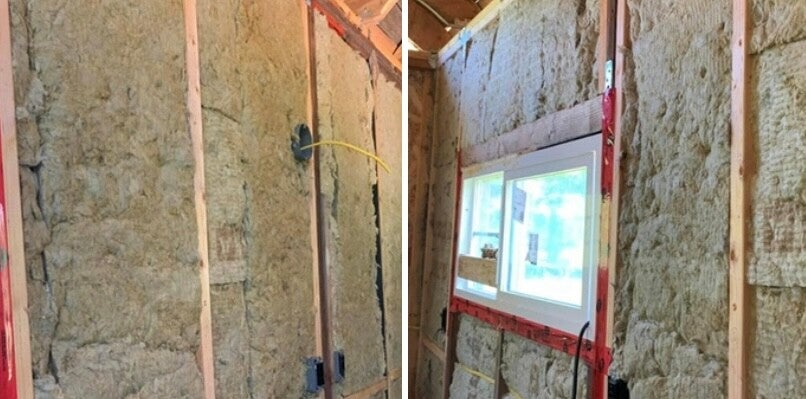
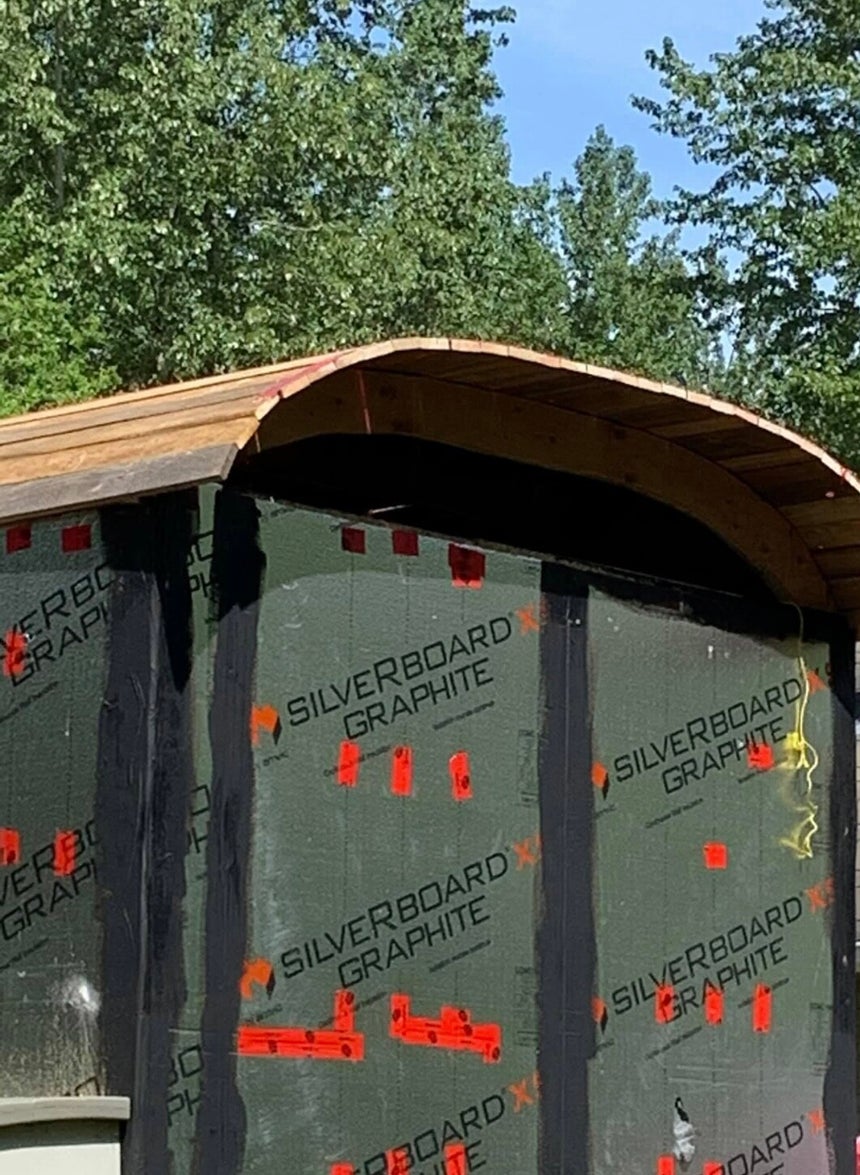
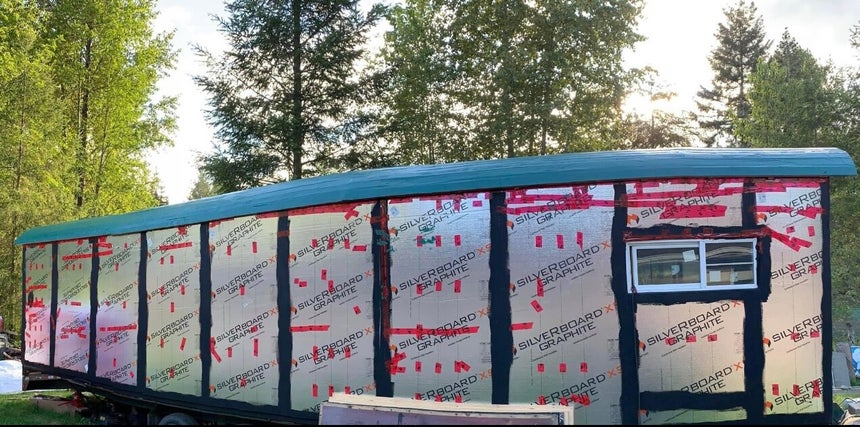
I completely sheathed the outside with exterior OSB Novacore insulated sheathing. I had enough plywood for the build and insulated sheathing was expensive, but I didn’t know (and still don’t) where I’d end up. I decided to build for anywhere in the world! The insulated sheathing provides continuous R5 value to my walls. On the outside of that sheathing I used SilveRboard exterior rigid insulation board made from Expanded Polystyrene (EPS) covered with a layer of polypropylene reflective lamination on both sides. This highly effective combination of materials offers high compressive strength and great thermal performance and added another R5 continuous insulation value to my walls.
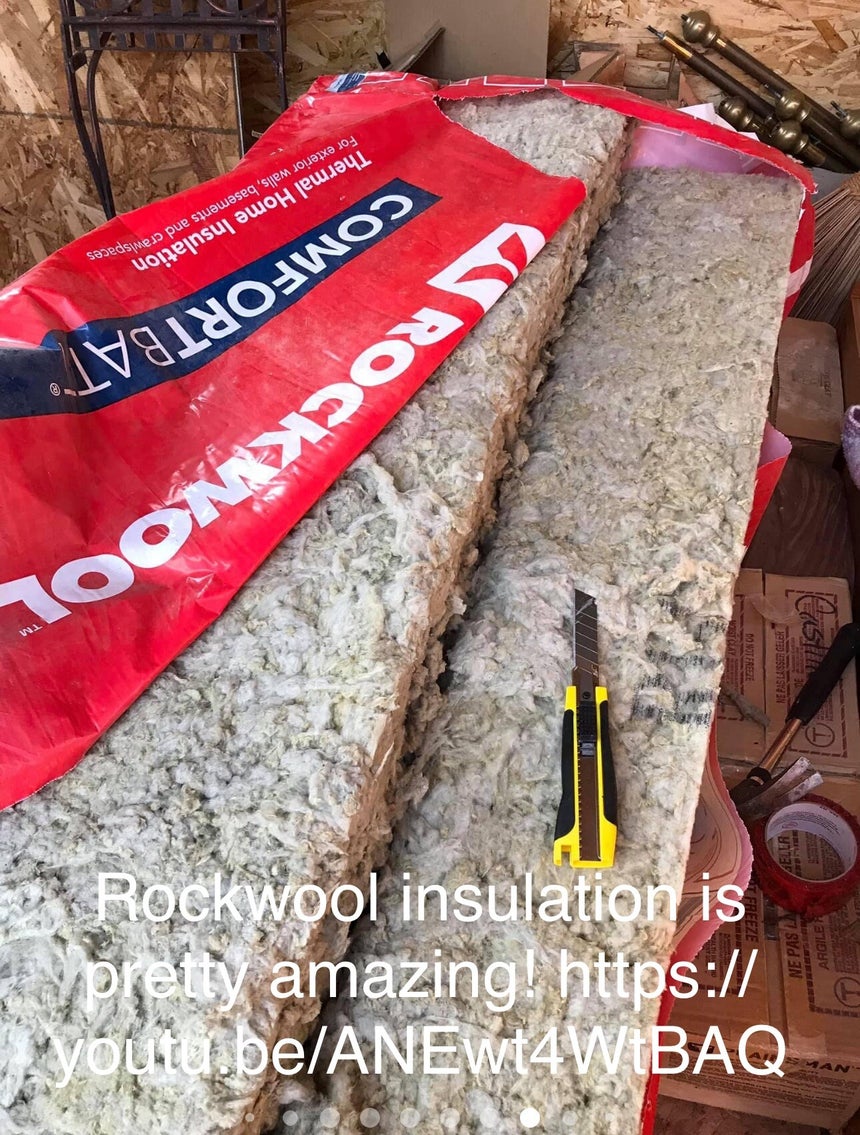
On the inside of the exterior walls I used R15 Rockwool Comfortbatt insulation, giving my walls R25 value before exterior siding.
Manufactured in Grande Forks BC, it’s a spun stone product that I personally tried to burn with a torch (pink fibreglass melted in that test) drown in a rain barrel (the rock wool drained to a useable state in a day and the pink fibreglass disintegrated) and then I left a batt of each (pink fibreglass and Rockwool) in a hay barn for a month. The fibreglass became “home” and bedding material to insects and rodents and the Rockwool was spurned by all but spiders, who hung their webs off of the batts edges.
Rockwool was another expensive investment in my home, but worth it! Rockwool insulation is pretty amazing! https://youtu.be/ANEwt4WtBAQ
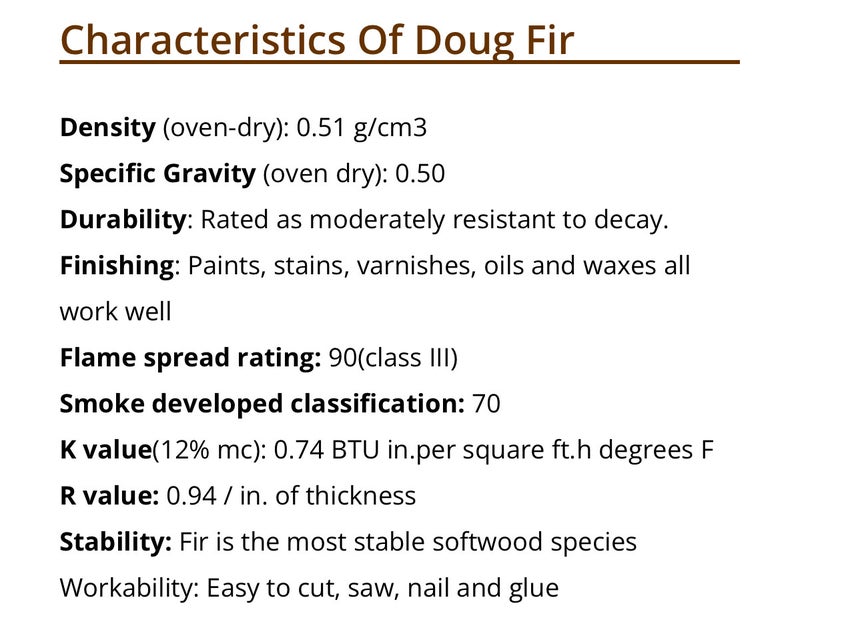
I already mentioned I used as much salvaged wood and other materials as possible. Most of the wood was marked as being Douglas Fir.
I hadn't known before my build, but when architects and engineers look for the best in structural lumber, their first choice repeatedly is Douglas Fir.
It is dimensionally stable and universally recognized for its superior strength-to-weight ratio. The high specific gravity of this species provides excellent nail and plate-holding ability. It also enjoys a documented superior performance against strong forces resulting from natural phenomena such as winds, storms and earthquakes. Douglas Fir is truly the ideal structural and general purpose wood for framing lumber in residential, light commercial, multi story and industrial construction.
The interior walls are all sheathed with the 1/4” Douglas Fir plywood and the exterior siding is Mill Cut Douglas Fir board and batten, adding an additional R2 to bring the insulating value of the walls to R27!
It takes very little to heat my 320 sq.ft. Movable Home and it stays cool in the heat of summer as well.
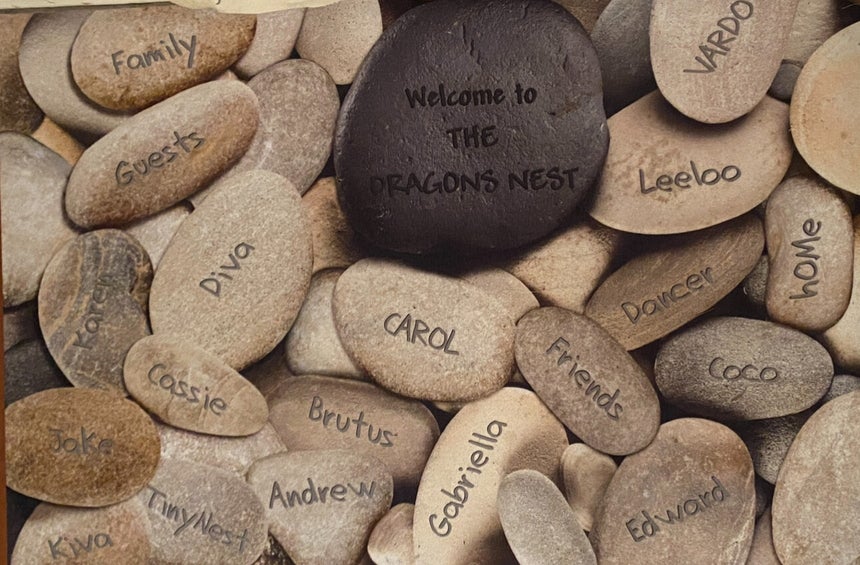
With the exterior shell (walls finished with SilveRboard rigid insulation sheathing and the temporary roof on, the build was moved 227km at 90km hour. It travelled like a pro, with zero racking. Peninsula Towing did the Haul and were impressed with how stable and easy The Dragons Nest was to pull!
Once at the new build site, the build continued.
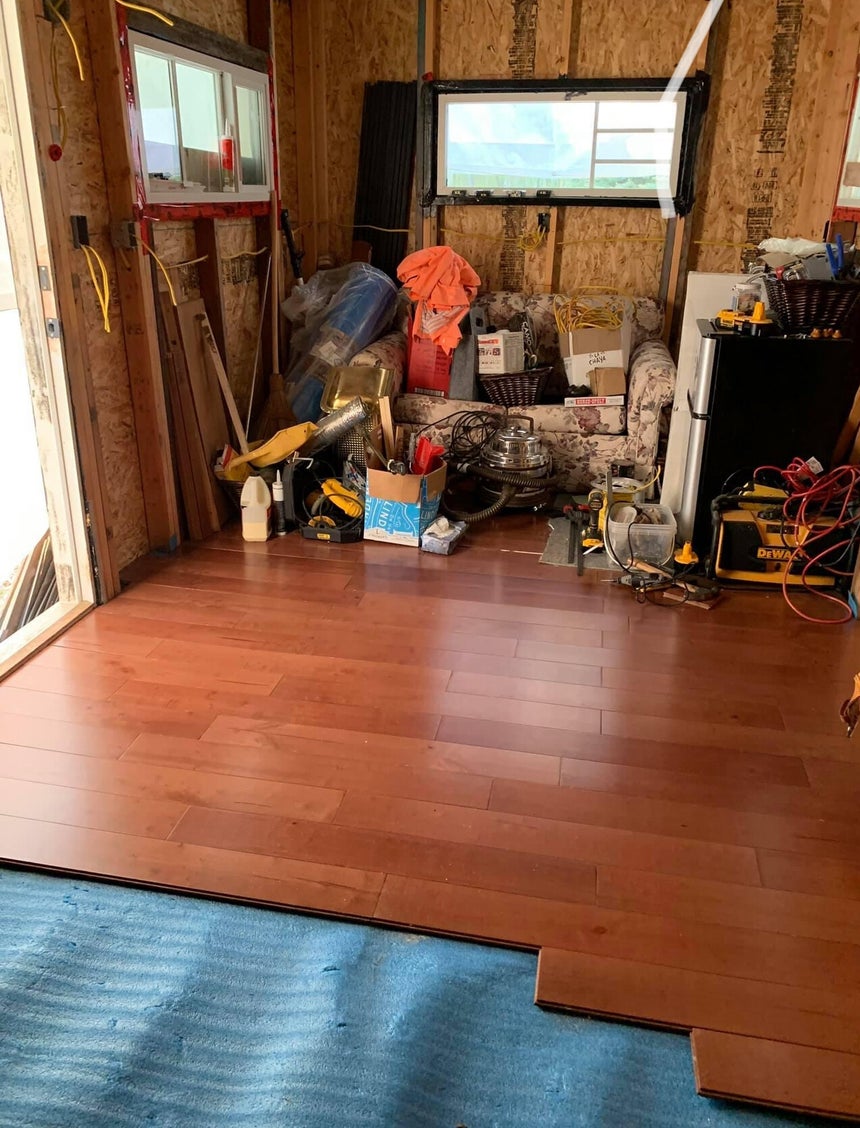
The walls were completed inside and out and the hardwood floor installed everywhere except the bathroom. The Bathroom will have its own blog!

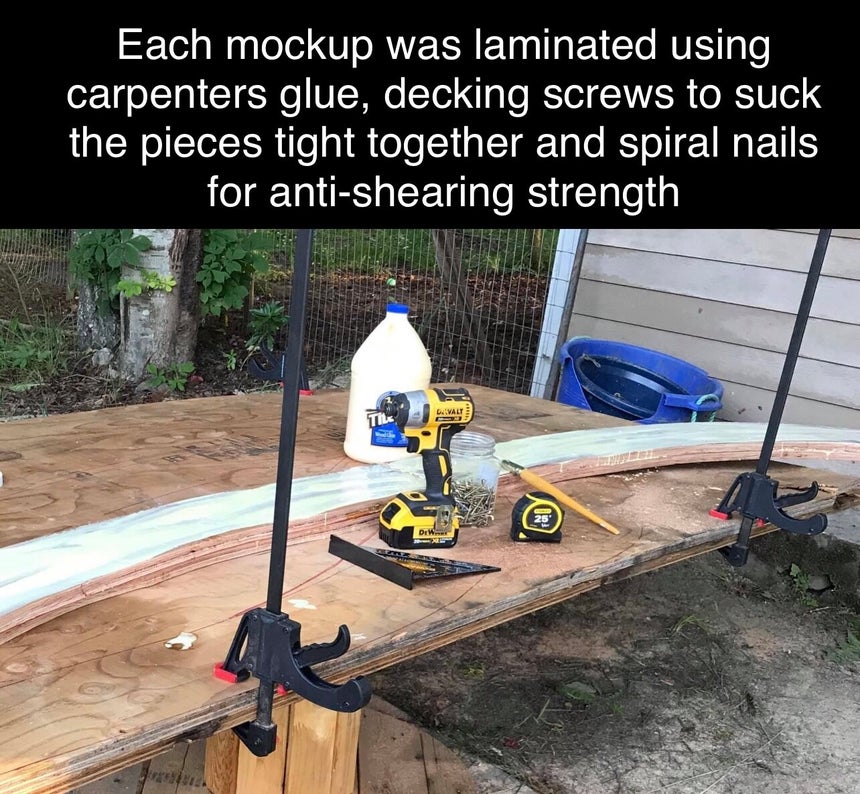
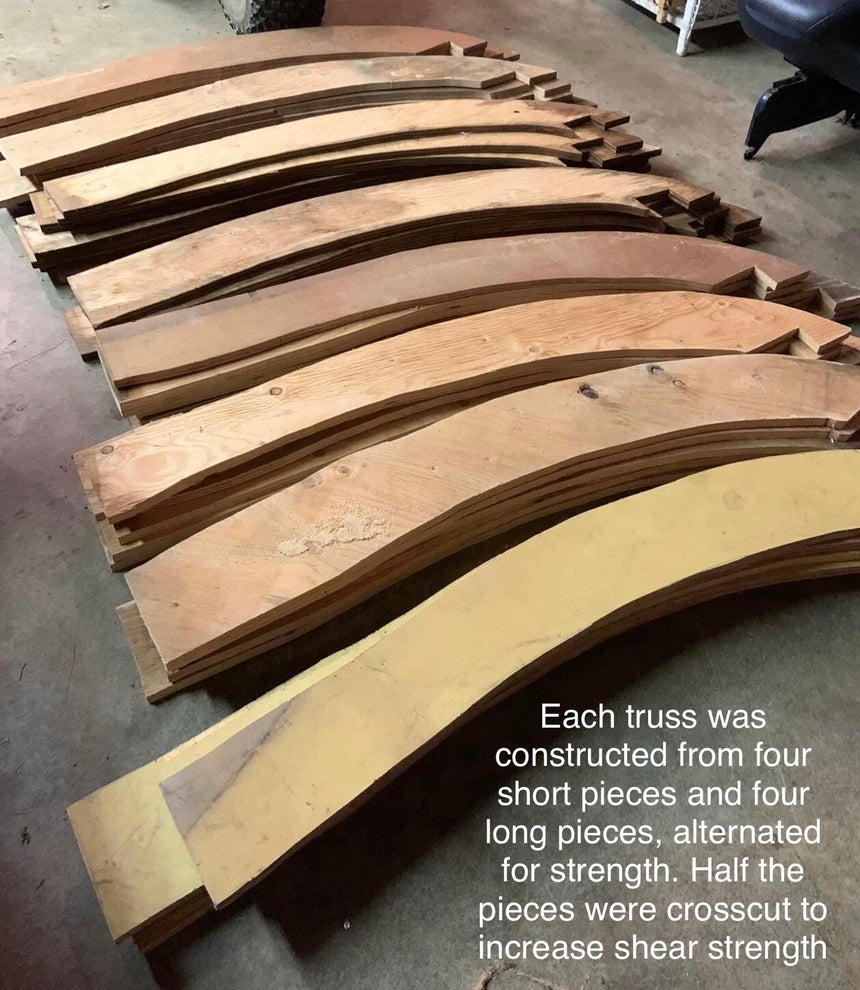
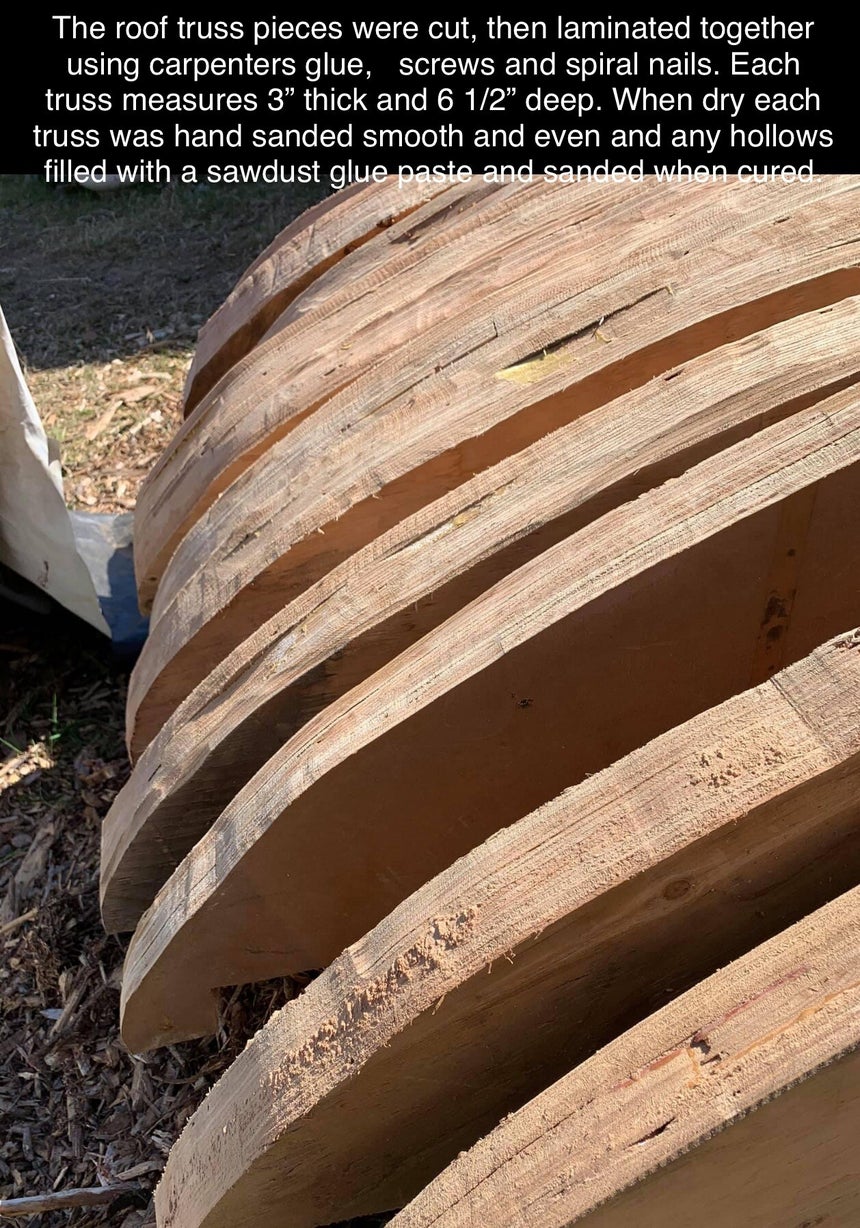
I began by making mock-ups to assess the curve and rise of the trusses, as well as the weight. Then, I cut, glu-laminated and sanded 25 arched trusses, 4” thick and 6 1/2” deep.
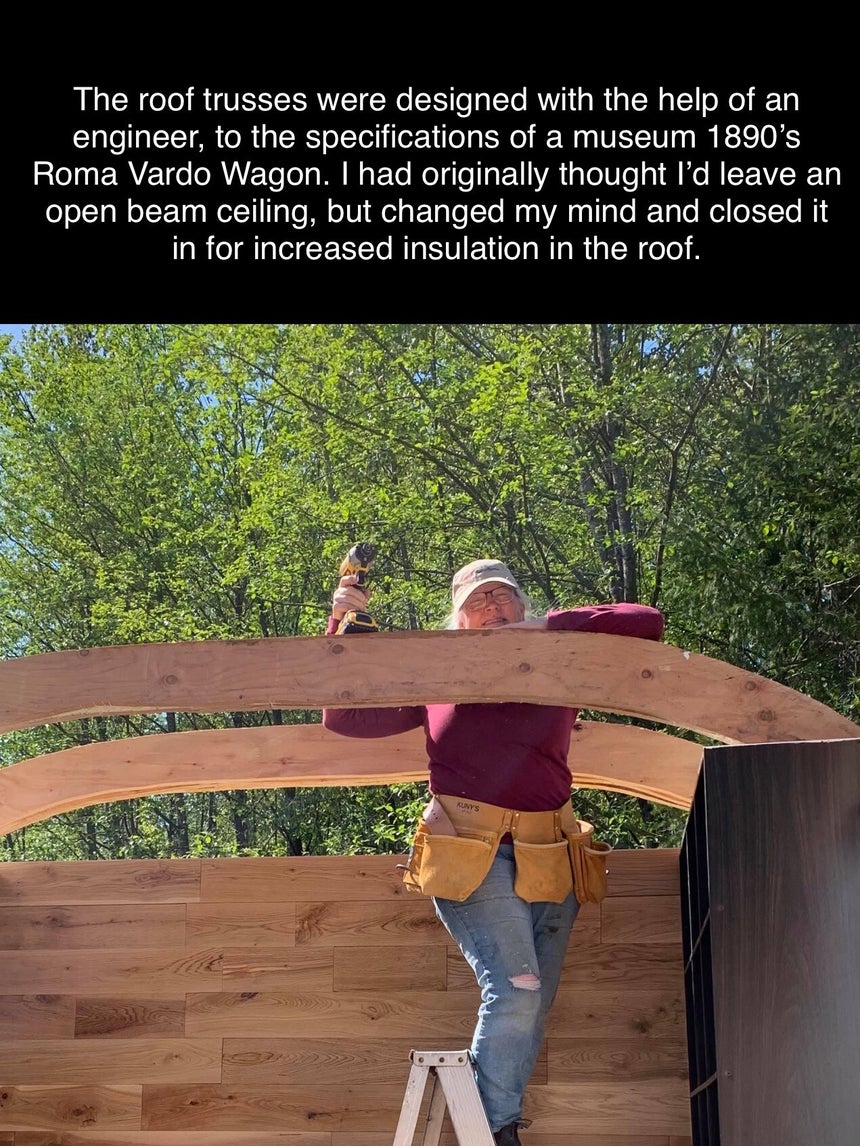
In another blog I will cover the ‘jigs’ I created to help myself support sheets of plywood, secure the unwieldy heavy roof trusses, and hold 2x4s plumb. I managed to build my home alone during COVID thanks to the creative use of ‘jigs’!
Once the trusses were up and secured, the roof was completed with Douglas fir mill cut 1” roof strapping. Over that a coating of liquid rubber, filling in any gaps between the boards.

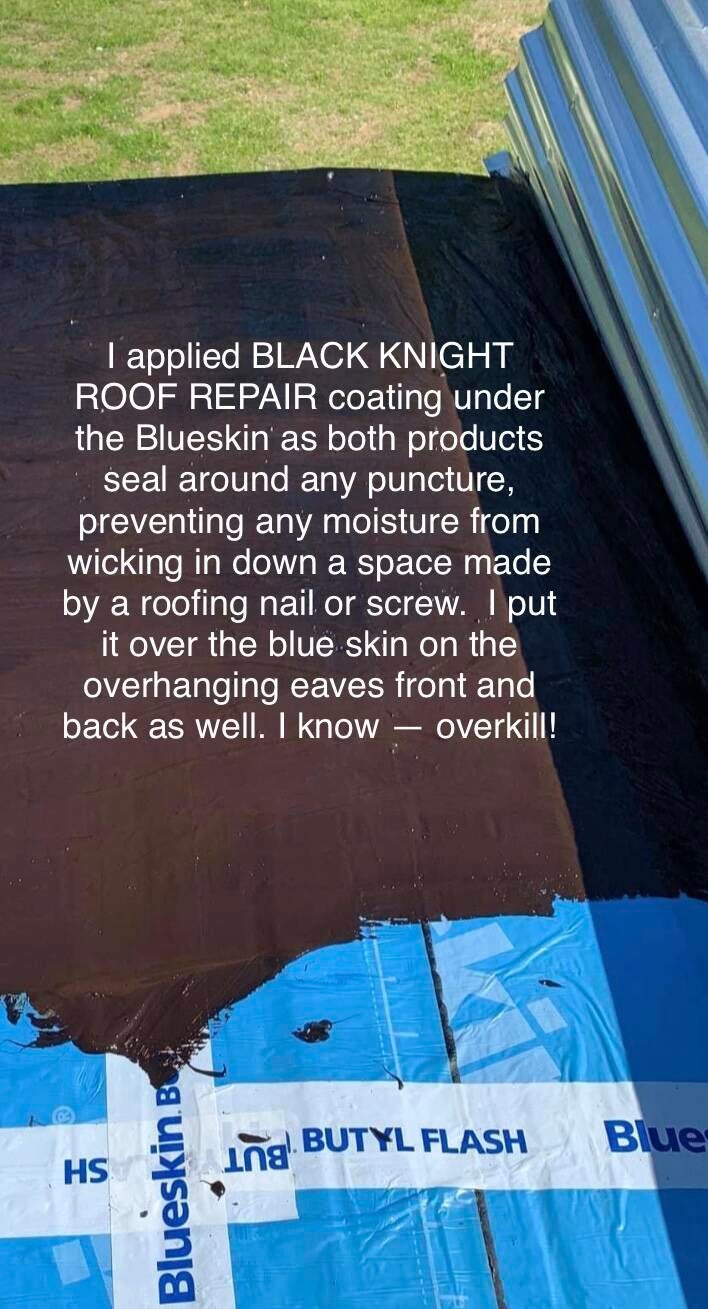
Over the liquid rubber a waterproofing material called BLACK KNIGHT ROOF REPAIR was painted on and when cured fully a complete Henry® Blueskin® RF200 self-adhering rubberized waterproof roofing membrane underlayment was applied. The product specification sheet calls it a secondary seal under shingles, cedar shakes, architectural metal and tiles. It's an SBS-modified bitumen roofing membrane reinforced with a superior skid-resistant polyolefin surface film. It self-seals around nails and fasteners for lasting watertightness and its fully adhering system prevents lateral moisture migration. It is a real challenge to apply alone and I screwed up with the application of my first strip. Luckily I suspected I might so had used a very small strip. I got better as I went along, but it sticks like nobodies business!!
The skid-resistant textured blue film surface was reassuring while working on the roof, and the paper liner was stubborn to remove, which actually helped with handling the Blueskin during application all alone. I highly recommend having another person to help with the application of this product, as it was hellish hard alone!

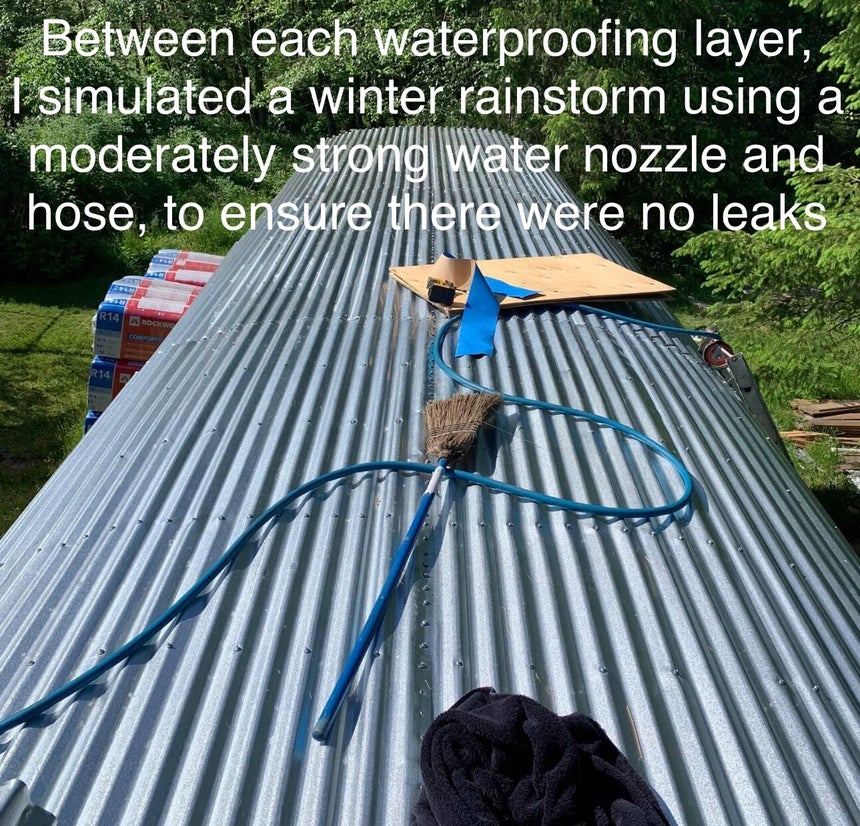
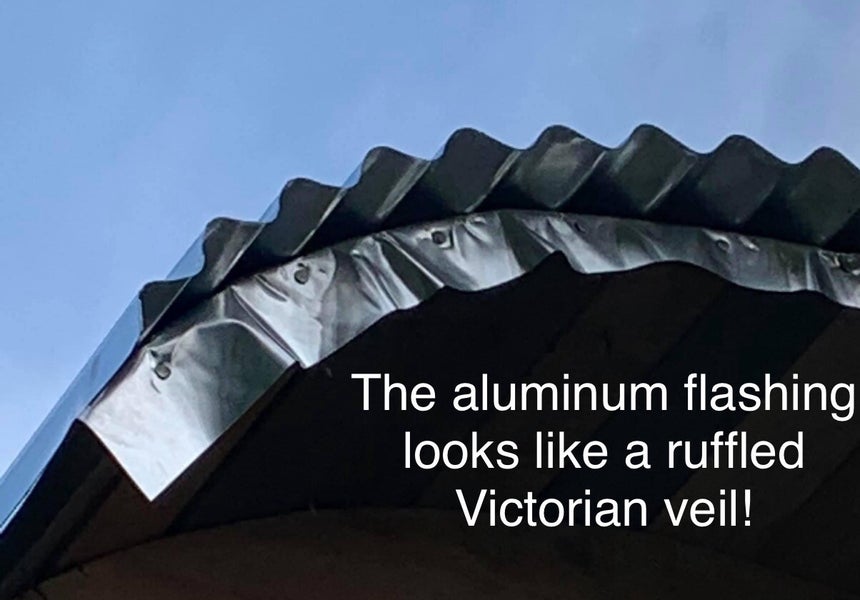
Over all these sealing layers a galvalume corrugated metal roof was put on. Between each layer a Rain Forest winter rain storm was simulated using a high pressure nozzle on a garden hose to ensure each layer was watertight. I realize it was overkill, and that I didn’t have to put that many layers of waterproofing on the roof. I just knew too many people at that time, and in that space who were having difficulties with leaky roofs. It just seemed like they were having their roots repaired every single year! I wanted to try to avoid that. I had access to the products at reasonable prices, so I went ahead and sealed my roof so that if you flipped it over, it could float in the ocean! Hopefully it’s at least a 20 year leak proof roof!
I continued overdoing the waterproofing, by applying the Black Knight Roof Repair waterproofing product over every seam and screw. It meant the roof didn't look as pretty from above, but it's well and truly sealed against water entry!
With the shell finished completely, roof on, and flooring completed, it was time to set my mind to what windows and doors would I add.
That’s a complete other blog!

Add comment
Comments
I had a tiny house building company that closed after only 4 houses because COVID hit but I used builders so it cost a lot more. I’m so very impressed that you did this on your own. I want to build a small cob house and as I’m 60 you have just inspired me. Thank you